Residual Stress Measurement
Residual stress measurement inside metal components.
X-ray diffraction is used to measure the residual stress inside mechanical components and other building objects. MIRRORCLE uses high-energy white X-ray, which enable deep and non-destructive measurements. Furthermore, the energy dispersive method allows measuring of complex shapes.
Example : Measurement residual stress inside a cog
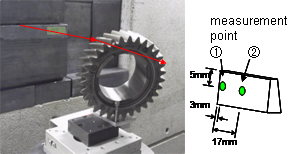
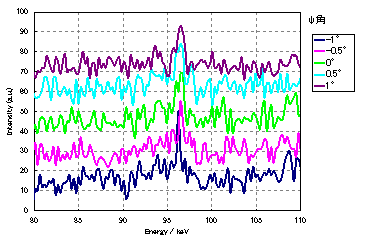
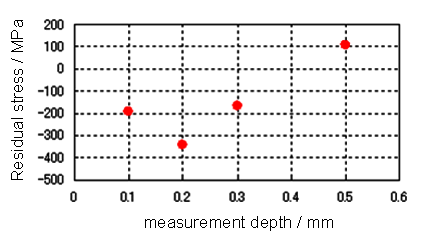
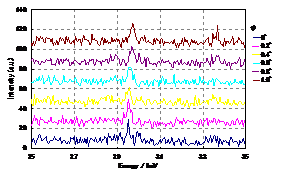
Diffracted X-rays at specific depths are measured by varying the sample orientation; the stress is calculated from the extent of the energy shift. Fe (110) X-ray diffraction peak graph (center figure) measured for a tooth in a helical gear (depth 0.2 mm) and residual stress (right figure).
These plots show that the tensile stress turns into compressive stress at a depth of 0.2 mm.
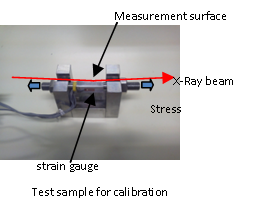
Example : Measurement residual stress from a strain gauge
 |
 |
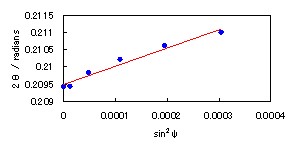 |
Our results using MIRRORCLE: 43.2 MPa From stress gauge 41.6Mpa |
| X-ray source | MIRRORCLE-CV1 |
|
X-ray energy |
10〜100keV |
| Optical system | Parallel optical system |
| Detector | Germanium semiconductor detector |
| Sample shape | Arbitrary |
| X-ray diameter | Less than 500μm(※) |
| Measurement region | Less than 1cm(※) |
| Maximum measurement depth | Less than 1mm for steel(※) |
| Depth resolution | Greater than 1μm(※) |
※Depends on conditions of measurement
